Vacuum formed products are all around us and play a major part in our daily lives, in this guide we will explain how to vacuum form. The vacuum forming process is a very popular technique used by many different industries across the UK. Getting it right requires expertise that very few companies have, at Plastic Mouldings Northern Ltd, we have over 100 combined year’s experience in vacuum forming.
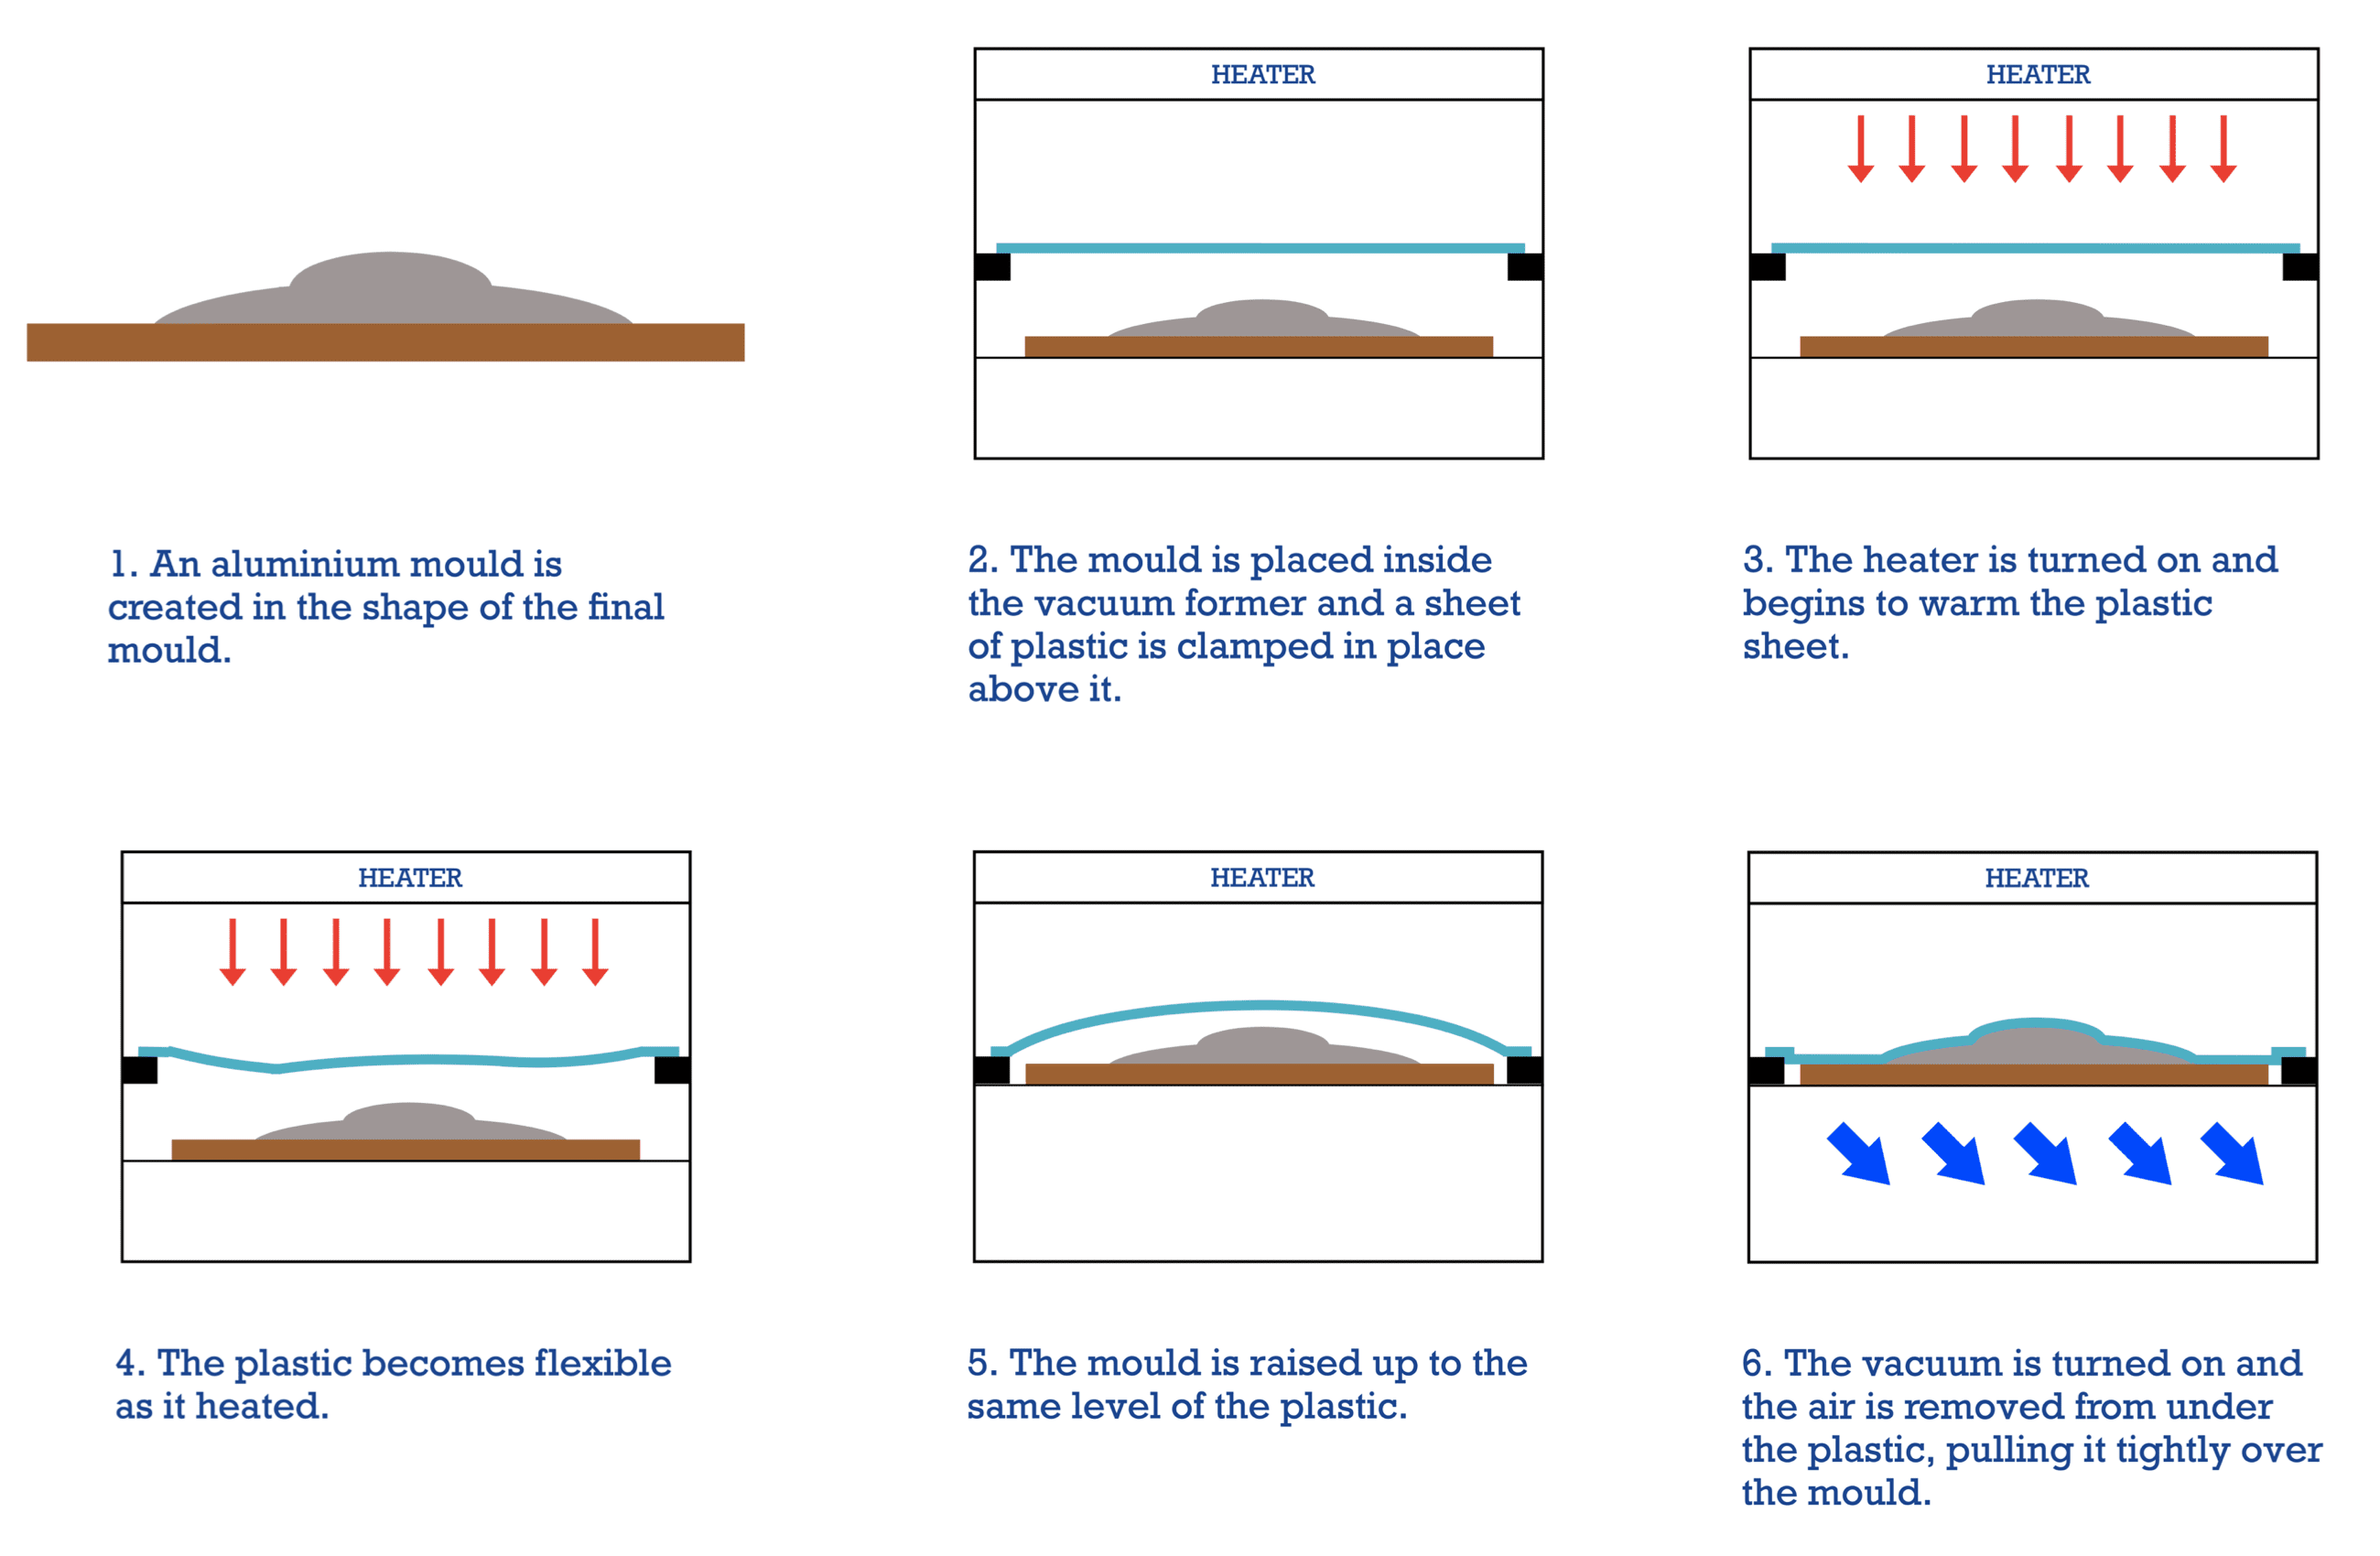
As mentioned, the whole process requires experience and expertise to achieve good quality results, but to give you an understanding of the process we have detailed the 6 main steps of the vacuum forming process below.
- Once the designs have been finalised an aluminium tool (mould) is made. This is made in the shape to which the plastic will form around. Often where possible, the mould should have angled edges, in order to allow the tooling to pop out of the plastic when made. Vacuum forming tools can even be made of wood (only suitable for very short production runs) or, if the product exists already, a tool could be resin cast from it.
- The mould is then placed into the vacuum former oven, and a plastic sheet is then clamped in to place above, but not on the mould. Machines come in various sizes, which allow different sized parts to be moulded, our machines allow us to form parts up to 3500mm x 1500mm (dependent upon depth) and up to 600mm deep (dependent on size).
- The heater is moved into position above the plastic. This will heat up, warming the plastic & allowing it to become flexible & mouldable.
- Temperatures can reach around 400° Celsius but are dependent upon the thickness and type of plastic being used. After a few minutes (again dependent on the thickness and material being used) the plastic should be at a temperature to allow moulding.
- Once the plastic sheet is ready the shelf on which the wooden mould is sat on, is moved upwards. The technician creates a bubble effect to stretch the plastic, this will give it a more consistent finish across the mould.
- The vacuum is then switched on, removing all air from the oven. This allows the plastic to form to the shape of the mould. The moulded part is then cooled. Once cooled, the sheet is removed from the oven, the mould is removed & any excess trimmed.
You can watch a video of how to vacuum form on Youtube
You can read an article on different plastics used in vacuum forming here.
You can also find out more about what we do and keep up to date with all our latest news by following us on Twitter, Facebook, Instagram and LinkedIn.


